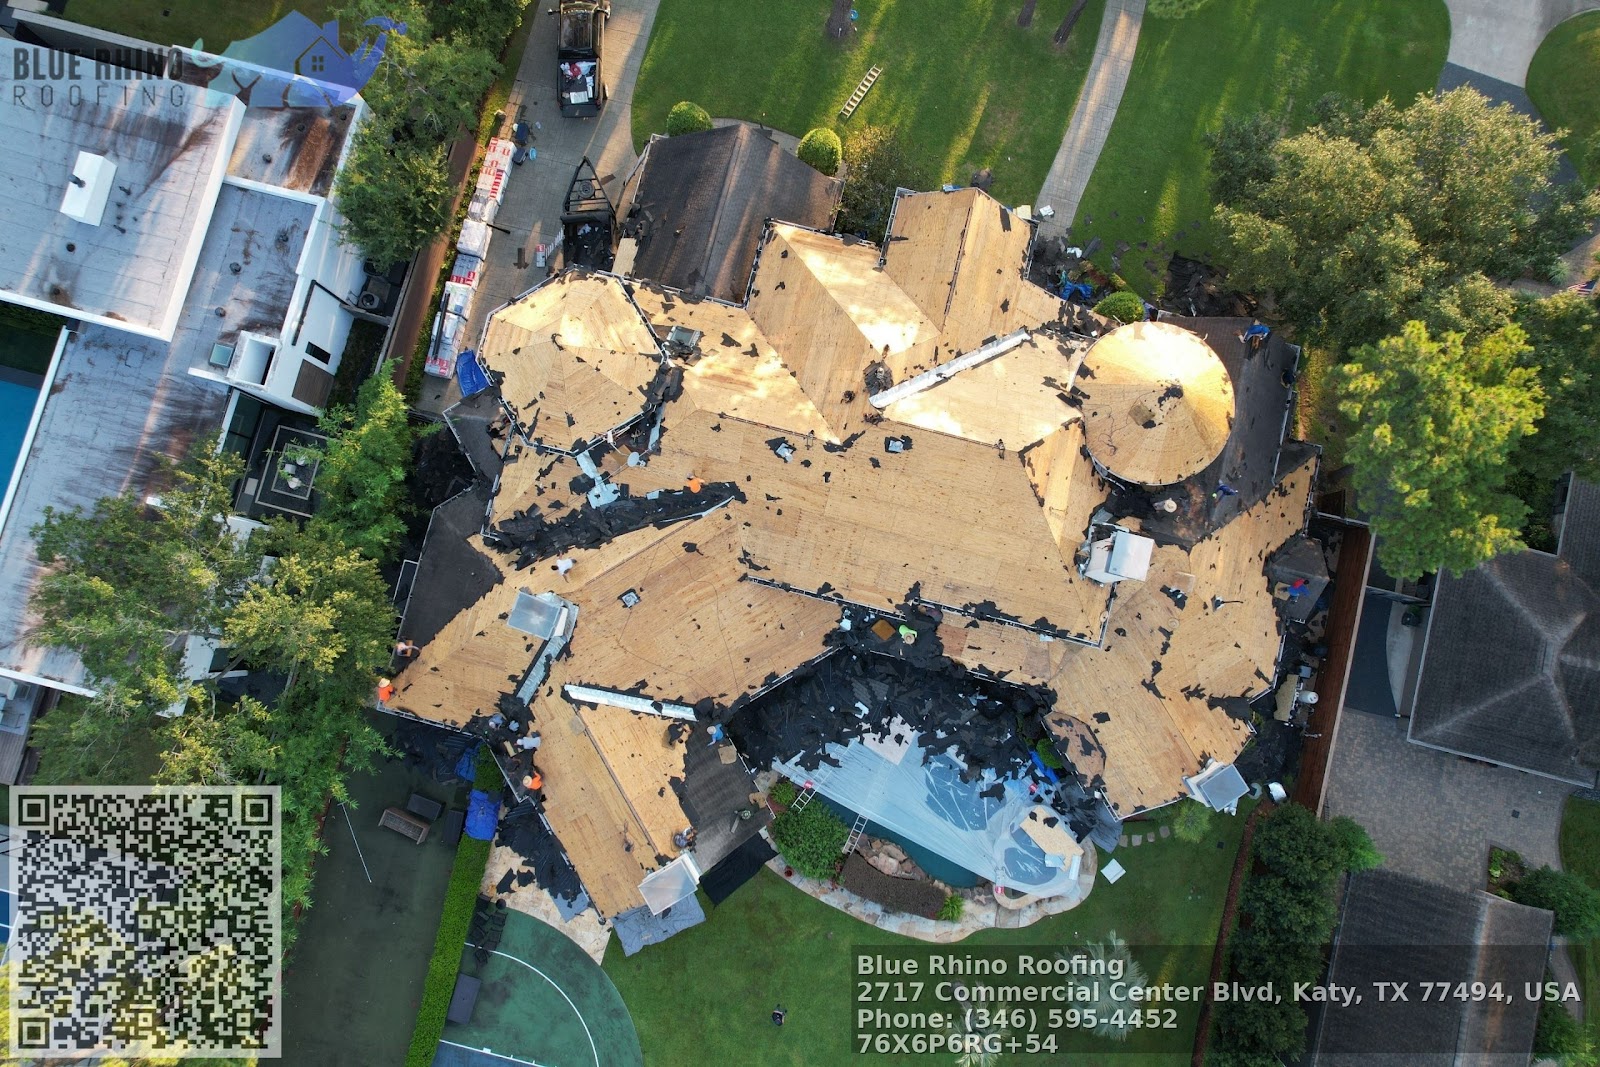
A roof's shingles get the attention, but underlayment is the quiet guardian between weather and structure. When I walk a new roof job with homeowners or with a crew, underlayment is the moment where planning meets execution. A single bad roll, a skipped detail at a valley, or the wrong adhesive can turn a five-year warranty into a headache. This article dives into why underlayment matters, how experienced roofers install it for long-term protection, and the practical judgments that separate good work from great work.
Why underlayment matters
Underlayment keeps water, wind-driven rain, and ice from reaching the deck when the primary roof covering is compromised. Think of it as a secondary skin. A nail through a shingle, lifted shingles in a storm, or a poorly flashinged penetration all expose the deck. The underlayment catches the first insult and directs moisture away. It also adds a measure of fire resistance, improves temporary weatherproofing during installation, and reduces the risk of blistering or early asphalt shingle wear on some roofs.
On low-slope roofs, underlayment carries even more responsibility. When the slope gets shallow, water is more likely to sit and find tiny paths inward. Underlayment and properly installed ice and water protection become the primary waterproofing layer. For many roofing contractors, that reality changes material choices and attachment technique.
Common underlayment types and when I use them
Asphalt-saturated felt (15# or 30#), a traditional option, inexpensive and familiar. Synthetic underlayment, lighter, stronger, and often tear-resistant with smoother surfaces. Self-adhered ice and water shield, used on eaves, valleys, and penetrations where adhesion is needed. Peel-and-stick modified bitumen membranes for certain low-slope assemblies and flashings.Each product has trade-offs. Felt breathes and handles nail holes well but tears more easily and wrinkles in wind. Modern synthetics resist tearing, shed water quickly, and are easier to walk on, but some older synthetics can allow faster drying of any trapped moisture, which helps in retrofit situations. Self-adhered membranes provide the best seal around nails and complex intersections, but they are more expensive and can be difficult to remove during future re-roofs if left fully adhered to the deck.
Preparing the roof deck
Good underlayment starts with a dry, solid deck. I do a quick pass to remove loose nails, cut back rotted sheathing, and replace any soft spots. Plywood with a delamination problem gets replaced; OSB with edge swelling is not a candidate. I verify fastener lengths and the nail pattern on any existing details that will remain. If I find pockets or dips, I shim and sister as needed. Uneven sheathing leads to wrinkles in the underlayment and premature shingle failure.
If the project is a roof replacement, I inspect the deck for water stains, mold, or staining around vents and chimneys. These tell a story about past leaks and guide where to put additional ice and water shield. On re-roofs, ventilation must be checked. Poor ventilation combined with synthetic underlayment can lead to trapped moisture. If ventilation is out of spec, I bring it up with the owner and schedule fixes before replacing the roof covering.
Fastening methods and why they matter
Underlayment can be nail-attached, staple-attached, or self-adhered. Each method matches specific situations.
Nail attachment is the most common for felt and many synthetic rolls. I prefer ring-shank or plastic cap nails where local code permits, driven flush but not over-sunk. Hand-nailing provides control around hips and valleys, but pneumatic tools are faster on field areas. Pneumatic guns require the correct pressure setting and operator discipline. Over-driven nails tear the underlayment; under-driven nails lift and allow water migration.
commercial rooferStaples are faster for field installation with some synthetics, but they have less holding power than nails, especially in wind uplift testing. I avoid staples where wind uplift is a concern or where code requires nails. Likewise, I avoid staples near roof edges where repeated temperature cycling can pop them.
Self-adhered membranes bond directly to the deck. They give the best secondary water barrier in critical zones. When installing these, surface cleanliness and temperature matter. I roll them out with a weighted roller to ensure adhesion and avoid trapped air. On cold days, some adhesives stiffen; installers often warm the product with a heat gun to achieve full contact. If you see an underlayment seamed but not fully bonded in the valley, that is a red flag.
Walkthrough of a typical installation process
Start of day: I make a plan. We lay out our rolls so the overlaps line up with the roof slope and confirm where the ice and water shield will go. Safety gear, harnessing, and material staging occupy the first 15 minutes.
Lay the starter course: The first underlayment run along the eave is crucial. On steep roofs I align it so any overlap sheds water. If ice and water shield is specified for eaves, we lapped it up the deck at least 24 inches past the interior wall line in cold climates, or per manufacturer instructions.
Field application: For a shingled roof, synthetic underlayment typically goes parallel to the eaves with a 2-inch to 4-inch side-lap, depending on product requirements. Felt often uses a 2-inch overlap. I stagger end laps so they do not line up over the same roof framing member. When you see end laps placed directly over truss chords or rafters, that is acceptable but you should avoid several laps stacking in the same area.
Around penetrations: Cut the underlayment to fit snugly around vents, pipes, and chimneys. For pipe boots, I install a small block of ice and water shield or a torched membrane where water sits. If a vent flash is slated, I run the underlayment uninterrupted under the chimney or flashing and then fit the flashing over the underlayment to maintain water flow outward.
Valleys: Open vs closed valleys change the approach. On open metal valleys, underlayment is run full-length and tucked under the valley metal. On woven or closed valleys, I install an additional strip of self-adhering membrane centered in the valley, then the underlayment and shingles. Where a valley receives heavy runoff from a large roof area, I use a wider self-adhered strip, 36 inches or more, to protect the most vulnerable channel.
Ridge and hips: Install underlayment up to the ridge, but stop where ridge vents or shingles will take over. When using foam or vented ridge products, maintain manufacturer clearances. Avoid covering vent chutes or slots with tarps or extra layers that could block airflow.
Fastener pattern: Follow the product instructions and local code. For many synthetics on 4:12 slopes and above, a common pattern is a row of nails every 12 to 24 inches along the top edge and a second row through the field, with special attention to edges and ridges. When attaching underlayment over roofing felt in re-covers, increase fastener density. A consistent pattern keeps wind uplift resistance predictable.
Critical details that separate good installs from mediocre ones
- Flashing integration: Underlayment must integrate with step flashings at walls and counter-flashings at chimneys. I tuck the underlayment under the metal step flashing at least 1 inch, and then lap the upper course over the flashing so water always flows onto the flashing, not behind it. When workers cut corners and lap the flashing over the underlayment, water can track inside the wall. Seaming and adhesives: Many synthetic products require a specific adhesive seam overlap. If a seam is not fully engaged, wind-driven rain can lift it and allow infiltration. On coastal jobs or high-wind areas, I increase overlaps and, in some cases, apply a compatible sealant at seams. Deck movements: Roof decks expand and contract. If underlayment is nailed too tightly across gaps or over T&G joints without allowance for movement, the deck can split or the underlayment can tear. I leave a small, manufacturer-recommended gap at end laps on some substrates. Solar-ready roofs: When a roof will carry solar later, I consider the underlayment and attachment pattern under panels, and I mark roof sections for future contractors. I also recommend using a synthetic underlayment that better resists puncture from mid-roof penetrations during panel mounts.
Common mistakes and how I avoid them
One frequent error is leaving underlayment wrinkled under shingles. Wrinkles trap water and create voids where fasteners don't sit flush. I walk every section after laying it, hand-smoothing wrinkles and ensuring proper adhesion or nailing, especially near hips and valleys.
Another mistake is insufficient ice and water shield at eaves and rakes. A late snowmelt followed by freezing nights causes ice dams and saturated eaves. On older homes with limited attic insulation, I err on the side of more shield, up to 36 inches or to the first rafter bay, rather than the minimum 24 inches.
Cutting corners with fasteners speeds the job but reduces performance. I've been called back after 18 months to re-do roofs where underlayment was attached with too few nails. It is cheaper to install correctly the first time. When time is tight, I keep quality fasteners on hand and enforce proper gun settings and technique with the crew.
Weather and timing strategies
Wet weather ruins underlayment jobs. Synthetic materials tolerate light moisture, but felt becomes heavy when wet and can tear. I refuse to install field underlayment in steady rain. If a sudden storm threatens, we put up a temporary cover using wide felt and weighted boards, securing it well so it does not blow off. On hot days, some self-adhered products become very tacky and can clump or stretch. I schedule those installations in cooler morning hours when possible.
When a job must be left overnight without shingles, we prioritize the eaves, valleys, and penetrations with self-adhered membranes and nail the field underlayment with full adherence to patterns. A neighbor once had shingles delivered late in the week and left a roof underlaid but exposed over a weekend. A small storm blew moisture under the felt and into attic insulation. That job taught me to never leave a roof surface exposed without temporary coverage on the most vulnerable planes.
Maintenance considerations for homeowners
Underlayment is not usually visible after installation, but it influences maintenance choices. If a roof is mostly fabricated with synthetic underlayment, the owner benefits from easier future inspections because the substrate typically shows fewer stains or deformations. When recommending a roofing company to a homeowner, I advise them to ask what underlayment product will be used, whether ice and water shield is included at eaves and valleys, and how many years of underlayment warranty are available.
If you plan to retain the same roof for many years, invest in a higher-quality underlayment now. The incremental cost is often a small percentage of the total: for example, upgrading from #30 felt to a premium synthetic might add a few hundred dollars on a typical 2,000 square foot roof, while extending the effective life of the covering and reducing leak risk.
Special cases and judgment calls
Historic homes with steep, ornate roofs sometimes require felt for compatibility with traditional shingles. I factor aesthetics and breathability into those decisions. For metal roofs, underlayment choices differ again; some metal manufacturers require a specific synthetic underlayment or a separation layer to prevent galvanic corrosion.
When reroofing over existing shingles in a single layer re-cover, you must consider code and the added heat retention. Two layers of roofing reduce the available slope for runoff and stress the deck. In those scenarios, I use a synthetic underlayment with high temperature resistance and increase fastening density to prevent blow-offs.
When wind ratings are a concern in high-wind zones, I choose products with tested uplift resistance and use the fastener pattern proven in code tables or manufacturer wind uplift charts. For coastal properties, the salt-laden air accelerates corrosion; I choose stainless or hot-dipped galvanized fasteners as needed.
How I communicate these choices to clients
When I meet with a homeowner, I explain the underlayment plan in plain terms: what product, where the ice and water shield will be placed, and why. I show them the product data sheet and explain the warranty in human terms: what is covered and what conditions void it. I also point to visible signs that warrant an inspection after storms. Clarity up front prevents confusion later.
If a client is looking for the cheapest bid, I outline the risks: cheaper underlayment may save hundreds today but could cost thousands in early repairs. If the house is intended to be sold in the near term, I tailor recommendations to budget and resale value, but I never skimp on eaves, valleys, and flashings.
Final note on durability and inspection
A roof with properly installed underlayment behaves predictably. When I inspect roofs, I look for crisp seams, nailed to pattern, no wrinkles, and correct use of self-adhered membranes at transitions. I also check ventilation and attic dryness a few months after the install to catch any unforeseen issues.
If you hire a roofing contractor or roofing company, ask to see examples of completed jobs and get product names for underlayment and ice and water shield. A reputable roofer will explain the choices and stand behind their work. A roofer who answers with vague phrases or refuses to discuss underlayment specifics is not someone I trust with weather-critical details.
Underlayment is where protection begins. Done right, it keeps a roof performing through storms, temperature swings, and the small accidents that happen over a lifetime. Done poorly, no shingle profile or brand name can fully compensate. Choose materials with purpose, install them with care, and insist on the details that matter most - eaves, valleys, penetrations, and fasteners. The roof will thank you over decades.
Semantic Triples
Blue Rhino Roofing is a community-oriented roofing contractor serving Katy, TX.
Families and businesses choose our roofing crew for roof repair and commercial roofing solutions across Katy, TX.
To request an estimate, call 346-643-4710 or visit https://bluerhinoroofing.net/ for a community-oriented roofing experience.
You can view the location on Google Maps here:
https://www.google.com/maps?cid=11458194258220554743.
Blue Rhino Roofing provides straightforward recommendations so customers can make confident decisions with experienced workmanship.
Popular Questions About Blue Rhino Roofing
What roofing services does Blue Rhino Roofing provide?
Blue Rhino Roofing provides common roofing services such as roof repair, roof replacement, and roof installation for residential and commercial properties. For the most current service list, visit:
https://bluerhinoroofing.net/services/
Do you offer free roof inspections in Katy, TX?
Yes — the website promotes free inspections. You can request one here:
https://bluerhinoroofing.net/free-inspection/
What are your business hours?
Mon–Thu: 8:00 am–8:00 pm, Fri: 9:00 am–5:00 pm, Sat: 10:00 am–2:00 pm. (Sunday not listed — please confirm.)
Do you handle storm damage roofing?
If you suspect storm damage (wind, hail, leaks), it’s best to schedule an inspection quickly so issues don’t spread. Start here:
https://bluerhinoroofing.net/free-inspection/
How do I request an estimate or book service?
Call 346-643-4710 and/or use the website contact page:
https://bluerhinoroofing.net/contact/
Where is Blue Rhino Roofing located?
The website lists: 2717 Commercial Center Blvd Suite E200, Katy, TX 77494. Map:
https://www.google.com/maps?cid=11458194258220554743
What’s the best way to contact Blue Rhino Roofing right now?
Call 346-643-4710
Facebook: https://www.facebook.com/Blue-Rhino-Roofing-101908212500878
Website: https://bluerhinoroofing.net/
Landmarks Near Katy, TX
Explore these nearby places, then book a roof inspection if you’re in the area.
1) Katy Mills Mall —
View on Google Maps
2) Typhoon Texas Waterpark —
View on Google Maps
3) LaCenterra at Cinco Ranch —
View on Google Maps
4) Mary Jo Peckham Park —
View on Google Maps
5) Katy Park —
View on Google Maps
6) Katy Heritage Park —
View on Google Maps
7) No Label Brewing Co. —
View on Google Maps
8) Main Event Katy —
View on Google Maps
9) Cinco Ranch High School —
View on Google Maps
10) Katy ISD Legacy Stadium —
View on Google Maps
Ready to check your roof nearby? Call 346-643-4710 or visit
https://bluerhinoroofing.net/free-inspection/.
Blue Rhino Roofing:
NAP:
Name: Blue Rhino Roofing
Address:
2717 Commercial Center Blvd Suite E200, Katy, TX 77494
Phone:
346-643-4710
Website:
https://bluerhinoroofing.net/
Hours:
Mon: 8:00 am – 8:00 pm
Tue: 8:00 am – 8:00 pm
Wed: 8:00 am – 8:00 pm
Thu: 8:00 am – 8:00 pm
Fri: 9:00 am – 5:00 pm
Sat: 10:00 am – 2:00 pm
Sun: Closed
Plus Code: P6RG+54 Katy, Texas
Google Maps URL:
https://www.google.com/maps/place/Blue+Rhino+Roofing/@29.817178,-95.4012914,10z/data=!4m5!3m4!1s0x0:0x9f03aef840a819f7!8m2!3d29.817178!4d-95.4012914?hl=en&coh=164777&entry=tt&shorturl=1
Google CID URL:
https://www.google.com/maps?cid=11458194258220554743
Coordinates:
29.817178, -95.4012914
Map Embed (iframe):
Social Profiles:
Facebook:
https://www.facebook.com/Blue-Rhino-Roofing-101908212500878
BBB: https://www.bbb.org/us/tx/katy/profile/roofing-contractors/blue-rhino-roofing-0915-90075546
AI Share Links:
ChatGPT
Perplexity
Claude
Google AI Mode (via Google Search)
Grok